When your ice maker is not working, you may get no cubes, tiny cubes, or ice that tastes off. Most failures come from water supply, freezer temperature, a tripped shutoff arm, or a clogged filter—not a “dead” ice maker module. Use this guide to isolate the cause before replacing parts.
Signs of Ice Maker Trouble

How to describe the failure
- No ice at all for 24+ hours.
- Hollow, small, or clumped cubes.
- Ice maker arm stuck “off” or bin overfilled then empty.
- Water dripping in the freezer or frost on the fill tube.
If the whole freezer is warm, start with cooling issues first—see fridge and freezer not cooling.
Safety First
- Unplug the refrigerator before removing ice maker covers.
- Shut off the water line if you disconnect tubing.
- Never chip ice from a fill tube with a knife—use warm water only.
- Keep fingers clear of the ejector gears.
Refrigerator ice systems rely on cold air and a steady water supply—see also general refrigerator care tips from the U.S. Department of Energy’s refrigerators and freezers guide.
Troubleshooting Steps
1. Confirm the ice maker is switched on
- Raise/lower the wire shutoff arm so it is in the ON position (usually down).
- On electronic models, enable Ice Maker in the control panel menu.
- Empty an overfull bin that may hold the arm up.
2. Check freezer temperature
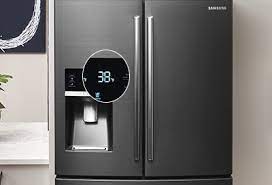
- Target about 0°F (−18°C) in the freezer.
- If warmer than 10°F (−12°C), ice production will stall.
- Clear blocked vents and avoid packing food against the ice maker.
Also compare with fridge not cooling but light is on if the fresh-food section is warm too.
3. Water supply and filter
- Confirm the saddle valve or shutoff behind the fridge is open.
- Replace a clogged water filter (often every 6 months).
- Inspect the fill line for kinks where the fridge is pushed to the wall.
4. Thaw a frozen fill tube
- Look for frost or ice blocking the tube above the mold.
- Warm the area with a hair dryer on low or a cup of warm water—never sharp tools.
- After thawing, run a few harvest cycles and discard the first ice.
5. Optical sensors and jammed cubes (bucket models)
- Clean infrared sensor windows with a soft cloth.
- Remove jammed cubes from the ejector fingers.
- Reseat the ice bin fully so sensors read “bin empty.”
When to Call a Pro
Keep Ice Coming
- Replace filters on schedule.
- Keep freezer near 0°F.
- Dump old ice monthly to prevent stale taste and clumps.
- Leave a little space around the ice maker for airflow.
An ice maker that is not working is usually a water, temperature, or shutoff-arm issue. Fix those first, then escalate to module replacement only when the basics check out.
Common Mistakes
- Leaving the shutoff arm up after emptying the bin.
- Replacing the ice maker when the filter is clogged.
- Chipping a frozen fill tube with a knife.
- Ignoring a warm freezer that cannot harvest ice.
Quick FAQ
How long after a filter change until ice returns? Often 12–24 hours of normal freezer temperatures.
Why are cubes small? Low water pressure, kinked line, or a partially clogged filter.
Is cloudy ice a failure? Usually minerals or trapped air—not a reason to replace the module.
Keep the freezer near 0°F (−18°C), replace filters on schedule, and only escalate to module replacement after supply and temperature check out.
What Success Looks Like
Once water, temperature, and the shutoff arm are correct, most ice makers need a full day to refill and harvest. Expect the first batches to be smaller; discard them if they taste of plastic or carbon from a new filter.
If the freezer holds 0°F and the fill tube is clear but you still hear no harvest after 24 hours, the module or valve is the next suspect—not another filter change.
Tools That Help
- Freezer thermometer (don’t trust the UI alone).
- Turkey baster or cup of warm water for fill-tube frost.
- Replacement filter matched to your model number.
Seasonal tip: after long power outages, discard ice already in the bin, wipe the mold dry, and allow a full freeze recovery before judging the ice maker “broken.”
Finally, remember that some “smart” fridges disable the ice maker after a demo mode or Sabbath mode toggle—check the control lock menu before ordering parts.